This month we will be covering some features in SQL 2022. Specifically, I will create a new SQL 2022 Development instance and connect it to Azure Arc. Azure Arc is not primarily for SQL 2022, but connecting it to on-premises and cross-cloud SQL servers is a very useful skill to have for managing hybrid environments, and it works with full functionality on Instances with Licensing that has Software Assurance or is Pay-As-You-Go, which limits its usefulness to the more recent versions. This is an especially useful tool because some companies are choosing the hybrid and multi-cloud approach as the answer to distributed high availability and disaster recovery.
1. Installing SQL 2022 Developer edition “ON-PREMISES”
I will be doing all of this in a Windows 11 Enterprise Evaluation Edition HYPER-V VM, you can get an ISO for that here:
Here is a guide for setting up a HYPER-V VMs on Windows:
If you haven’t already, you can get SQL 2022 Developer Edition for free here:
Once installed, you can get SQL Server Management Studio(SSMS) / Azure Data Studio for free here:
Once I have SQL Installed and my VM restarted, I need to load some test databases in; here are the ones I used:
- Wide World Importers – https://github.com/Microsoft/sql-server-samples/releases/tag/wide-world-importers-v1.0 ( I used ‘WideWorldImporters-Full.bak’)
- Stack Overflow 10GB – https://www.brentozar.com/archive/2015/10/how-to-download-the-stack-overflow-database-via-bittorrent/ (I used the ‘10GB Direct Download’) – this one will need to be unzipped, my machine took about 8 minutes to do so.
Once the Wide World Importers .Bak file is in the SQL Backup Folder (This will be ‘C:\Program Files\Microsoft SQL Server\MSSQL16.MSSQLSERVER\MSSQL\Backup’ unless you changed it during the installation) you can run the below script in SSMS to restore the backup.
/* Wide World Importers*/
 USE [master]
RESTORE DATABASE [WideWorldImporters] FROM  DISK = N'C:\Program Files\Microsoft SQL Server\MSSQL16.MSSQLSERVER\MSSQL\Backup\WideWorldImporters-Full.bak' WITH  FILE = 1,  MOVE N'WWI_Primary' TO N'C:\Program Files\Microsoft SQL Server\MSSQL16.MSSQLSERVER\MSSQL\DATA\WideWorldImporters.mdf',  MOVE N'WWI_UserData' TO N'C:\Program Files\Microsoft SQL Server\MSSQL16.MSSQLSERVER\MSSQL\DATA\WideWorldImporters_UserData.ndf',  MOVE N'WWI_Log' TO N'C:\Program Files\Microsoft SQL Server\MSSQL16.MSSQLSERVER\MSSQL\DATA\WideWorldImporters.ldf',  MOVE N'WWI_InMemory_Data_1' TO N'C:\Program Files\Microsoft SQL Server\MSSQL16.MSSQLSERVER\MSSQL\DATA\WideWorldImporters_InMemory_Data_1',  NOUNLOAD,  STATS = 5

GO
Stack Overflow will be unzipped and you can move the .mdf, .ndf and .ldf files to the data folder (C:\Program Files\Microsoft SQL Server\MSSQL16.MSSQLSERVER\MSSQL\DATA’ if you didn’t change it during installation) you can run this attach command:
 /*Stack Overflow */
USE [master]
GO
CREATE DATABASE [StackOverflow2013] ON
( FILENAME = N'C:\Program Files\Microsoft SQL Server\MSSQL16.MSSQLSERVER\MSSQL\DATA\StackOverflow2013_1.mdf' ),
( FILENAME = N'C:\Program Files\Microsoft SQL Server\MSSQL16.MSSQLSERVER\MSSQL\DATA\StackOverflow2013_log.ldf' ),
( FILENAME = N'C:\Program Files\Microsoft SQL Server\MSSQL16.MSSQLSERVER\MSSQL\DATA\StackOverflow2013_2.ndf' ),
( FILENAME = N'C:\Program Files\Microsoft SQL Server\MSSQL16.MSSQLSERVER\MSSQL\DATA\StackOverflow2013_3.ndf' ),
( FILENAME = N'C:\Program Files\Microsoft SQL Server\MSSQL16.MSSQLSERVER\MSSQL\DATA\StackOverflow2013_4.ndf' )
 FOR ATTACH
GO
At this point, you have a developer edition of SQL 2022 loaded with two databases. This is a good start to your test environment. Next, we get into building the connection to AZURE ARC.
2. Setting up for Azure connectivity:
First, you need to have an Azure subscription. You can start free (with a credit card) and $200 worth of Azure credits, which will be more than enough for what we will be configuring today.
*CAUTION* Make sure to DELETE all Azure resources after this lab, as costs can quickly grow the longer they are running. This guide will instruct you to put everything in the same resource group, and I will provide a DELETE resource group via Azure CLI for when you are done testing.
Here is the link to create an Azure subscription for your testing:
Once you have that set up, use this link to install Azure CLI on your test VM:
You can run script in a command prompt window to make sure your Azure CLI is up to date:
az --version
To finish the connection, log into the Azure Portal in a web browser on your VM and run this script in command prompt:
az login
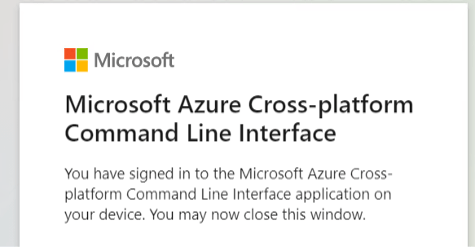
If you are successful, you will see a web page with this message:

Run this in command prompt to find the available subscriptions:
az account list
If you are not using a newly created Azure account for this, make certain that the subscription you are using is the one you mean to run these tests in:
az account set --subscription <subscription_id>
Create a Resource Group to organize all of the new resources you will be creating in one “box” that can easily be deleted later:
az group create --name SPAprilBlogTestResourceGroup --location eastus
Once these are set up, you are ready to connect this and any other servers to Azure Arc:
3. Connecting to Azure ARC
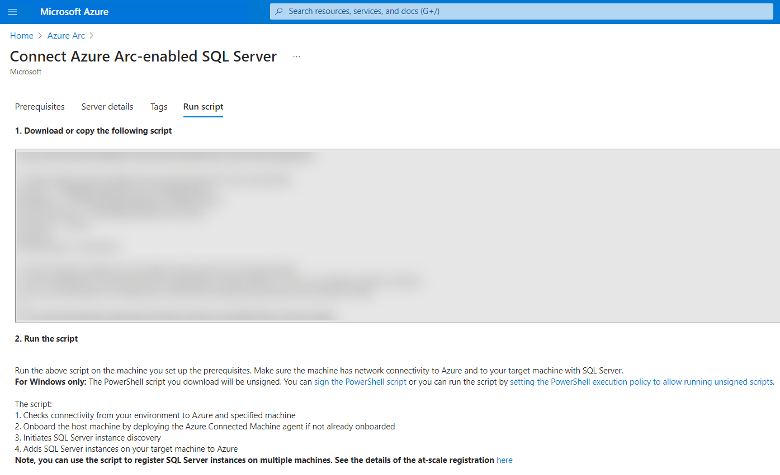
Connect the server to Azure ARC via Powershell, the script is provided if you search ‘Arc’ in the search bar at the top of the Azure portal window.
After filling in your server’s details, you will get a script to auto-deploy the agent:

After a moment, you will get an easily missed prompt to log in and enter a code to ensure this is a planned connection:

If successful, you will see this:

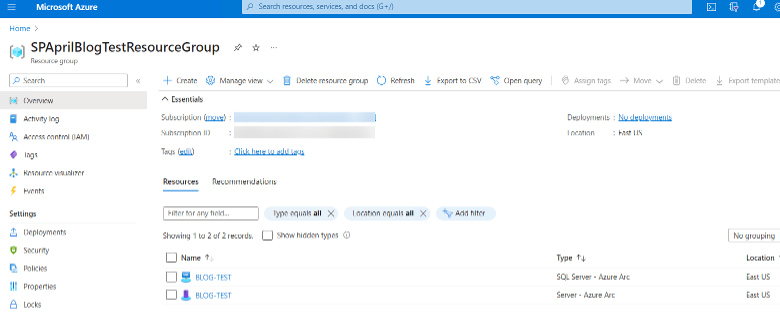
Once this completes, Azure will be able to see the Server and SQL sides, and while the functionality is limited with a development environment, the speed at which you can add your on-premises SQL servers and beyond to Azure Arc is blistering. The benefit of having a single location for security, patching, policy, and overall server health is fantastic, and while it won’t replace some other tools, such as agent alerts and performance monitoring tools, it is a great start for the hybrid SQL Database Administrator.

When you combine the advanced features of Azure Arc with other cloud-enabled capabilities of SQL 2022, such as Distributed Availability Groups, Azure Synapse Link for real-time transaction log reading and loading into Synapse workloads, Azure Active Directory (AAD) authentication, and Azure Purview Data Ownership Policies, it creates a robust and high-performance version of SQL Server that offers a wide range of functionalities.
Here is the script to delete the resource group – please make sure you delete the resources you created so you don’t get a surprise credit card bill later:
az group delete --name SPAprilBlogTestResourceGroup --yes --no-wait
I hope you use this as a start to learning more about the capabilities of SQL 2022, as well as putting some tools for Azure Database Administration in your toolbelt!

