As DBAs we install SQL Server for various reasons regularly. If you could save time for each installation for more critical tasks, would you?
In this blog post, we will audit the dbatools command Install-Dbainstance. I will test, review, and evaluate the script based on a series of identical steps. Our goal is to provide insights, warnings, and recommendations to help you use this script effectively and safely. Install-Dbainstance is a powerful tool to automate the install and configuration of a new SQL Server instance. It works well in scenarios that require frequent deployments of SQL Server instances.
This script simplifies this crucial yet tedious task while allowing for every single option you would typically need or care about to be included. For many, this may be the first step you make into the world of Infrastructure as Code, which is a new industry expectation. If you can script the deployment of a piece of infrastructure to increase delivery speed without losing the options needed to make it reliable and performant, why wouldn’t you? If you are still installing SQL Server manually, consider using Install-DbaInstance instead. I promise it can make your SQL Install processes faster, less error prone, and save you tons of time!
Scope
Dbatools is a community project full of bright minds. This audit series is more an informational series on useful capabilities and considerations rather than rigorous testing. This is to inspire even greater use of PowerShell and by extension dbatools as I believe it will assist in automating many tasks as a DBA.
1. Script Overview
Script Name: Install-DbaInstance
Authors: Reitse Eskens and Kirill Kravtsov
Description: This function will help you to quickly install a SQL Server instance.
2. Testing Environment Setup
I created a multi-subnet lab with three developer edition SQL Server instances, one SQL Express and a network share based on this blog post by Jonathan Kehayias.
Download and Install
You are probably familiar with dbatools at this point, but if not now is the perfect time to familiarize yourself with the install and use of the module. On your test environment you can open PowerShell and run the following scripts. These will install Dbatools and add it to the path for future projects as well as import it into the current session for the purpose of testing the scripts of this blog post.
Install-Module Dbatools
Import-Module Dbatools
Initial Setup
To save both me and you time, I will skip the test environment steps since they are identical here to my first post. Instead, I will encourage you to take your time with this command. There are a lot of SQL Instance configurations that should be considered before an installation. Unfortunately, it can be very simple to install SQL Server. The ‘Next, Next, Finish’ that can be used to describe some installations is not a compliment for efficiency, but rather pointing out how some do not do their due diligence during a SQL Install to configure it for long term health and performance. Please take time to look into the SQL Server installation best practices document we put together to get some insight into the considerations of a healthy, well configured SQL server installation.
3. Execution
Now that your environment is set up and you’ve read the entire best practices document, we can get into the scenarios. Each scenario is based on a standard use case and is meant to be a platform for you to design your own scripts for your own environment.
Scenario 1: Fresh Install of a Default Instance
This scenario is likely the primary use case for most DBAs who would use this script. Turning new instance deployments into a template and saving them are the first steps to DBA infrastructure as code and simplifying future deployment requests.
This script asks for a few variables to be completed for each run: the target host, the service account that will run the SQL Engine and Agent accounts to simplify access to domain resources, and the credential for the account that has access to the remote host to run this process as (which is required as using the integrated authentication of the PowerShell session caused a known error to be thrown asking for the credential argument to be used).
After that, I looked through each of the arguments and was able to hit every option we normally look for in a new SQL Server install. The Install-DBaInstance command doesn’t have an argument for every configurable option but it does allow any configuration option from the .ini file to be passed to the ‘Configuration’ argument. I looked through a .ini file to get what I wanted and created a hash table of the configuration options that we would typically change.
An aside for the new people in data; The .ini file I referenced is an initialization file that is created with all of the configurations used to setup the SQL Server instance based on selections in the GUI during the installation. It can typically be found in following directory after an install, if you wanted to use an existing server in your environment to inform your template. <C:\Program Files\Microsoft SQL Server\XXX\Setup Bootstrap\Log\YYYYMMDD_hhmmss. XXX is the SQL version number, 160 would be SQL 2022.
A few other considerations:
- The SQLserver2022.iso installer contents needed to be extracted to a folder so that the setup.exe was accessible by the script, referencing the .iso will not work.
- I only wanted the engine feature to be installed; your environment may be different.
- The restart flag will only restart the target if the system marks itself as needing a restart. Our best practice is restarting after installing a new instance or patching. I added a force restart of the target host to make sure we meet this best practice.
- I added a stopwatch to impress upon you as the reader just how much time you may be able to save comparing the setup of this script and using it vs the manual install process you may be using now.
$s0 = [system.diagnostics.stopwatch]::startNew()

$TargetComputer 	                = 'LabSQL3'
$serviceAccount                     = $Host.UI.PromptForCredential("Engine & Agent Service Account", "Please enter the domain credentials for the SQL Engine and SQL Agent.", "Lab\SQLService", "")
$Cred                               = $Host.UI.PromptForCredential("Domain Account with permissions to run this process", "Please enter the domain credentials this process to run successfully on the remote target and with access to the network share.", "LAB\DA", "")


$config = @{
    UpdateEnabled                   = 'False' # auto update sql during the installation
    USEMICROSOFTUPDATE              = 'False' #use MS updater to keep SQL Server up to date.
    AGTSVCSTARTUPTYPE               = "Automatic" #automatic sql agent startup
    SQLMAXDOP                       = "2" #manually set maxdop
    SQLTEMPDBFILECOUNT              = "8" # The number of Database Engine TempDB files.
    SQLTEMPDBFILESIZE               = "32" # Specifies the initial size of a Database Engine TempDB data file in MB.
    SQLTEMPDBFILEGROWTH             = "64" # Specifies the automatic growth increment of each Database Engine TempDB data file in MB.
    SQLTEMPDBLOGFILESIZE            = "8" # Specifies the initial size of the Database Engine TempDB log file in MB.
    SQLTEMPDBLOGFILEGROWTH          = "64" # Specifies the automatic growth increment of the Database Engine TempDB log file in MB.
    TCPENABLED                      = "1" # Specify 0 to disable or 1 to enable the TCP/IP protocol.
    SQLMAXMEMORY                    = "10240" # Use SQLMAXMEMORY to cap the maximum amount of memory available to the SQL Server Memory Manager.
    }


$splat = @{
    Credential                      = $cred
    SQLinstance                     = $TargetComputer
    Version                         = 2022
    Feature                         = 'Engine'
    AuthenticationMode              = 'Mixed'
    Path                            = '\\labshare\SQLBackups\SQL ISOs\2022\Developer\setup.exe'
    InstancePath                    = 'D:\SQLroot\'
    Datapath                        = 'D:\SQLData\'
    Logpath                         = 'L:\SQLLogs\'
    Temppath                        = 'T:\Tempdb\'
    BackupPath                      = '\\Labshare\SQLBackups\'
    AdminAccount                    = 'LAB\DA', "LAB\Administrator", 'LAB\SQlservice'
    SQLCollation                    = 'SQL_Latin1_General_CP1_CI_AS'
    EngineCredential                = $ServiceAccount
    AgentCredential                 = $ServiceAccount
    PerformVolumeMaintenanceTasks   = $True
    Restart                         = $True
    Configuration                   = $config
    Confirm                         = $false
    Whatif                          = $False
}

Install-DbaInstance @Splat

Restart-Computer -ComputerName $TargetComputer -force

$s0.stop()
Write-host "Complete: - $($s0.Elapsed.Minutes) minutes, $($s0.Elapsed.Seconds) seconds."
This is a longer script than we typically use but considering the number of switches and levers the GUI based install process has and how repetitive it can be, getting it all on one script is a breath of fresh air for me. I opted not to use the passing of a .ini file capabilities of the install-dbainstance command because the settings in the .ini file can be integrated into the script with the configuration argument.
Doing it this way has two benefits.
- There is no ambiguity in what settings are being changed. The process doesn’t just use the premise of ‘Copy Server A’s configuration’.
- A clear template means for easier changes or new templates to be created. All production instances have a certain memory, maxdop, or set of features? Easy enough to add if those things are all a part of the script rather than an ini file. No need to manage this script as well as a corresponding .ini file
It only takes a few moments to look at an .ini file from a previous install to see and mirror those configurations on a new template and it improves the user’s understanding of what is happening.
Results
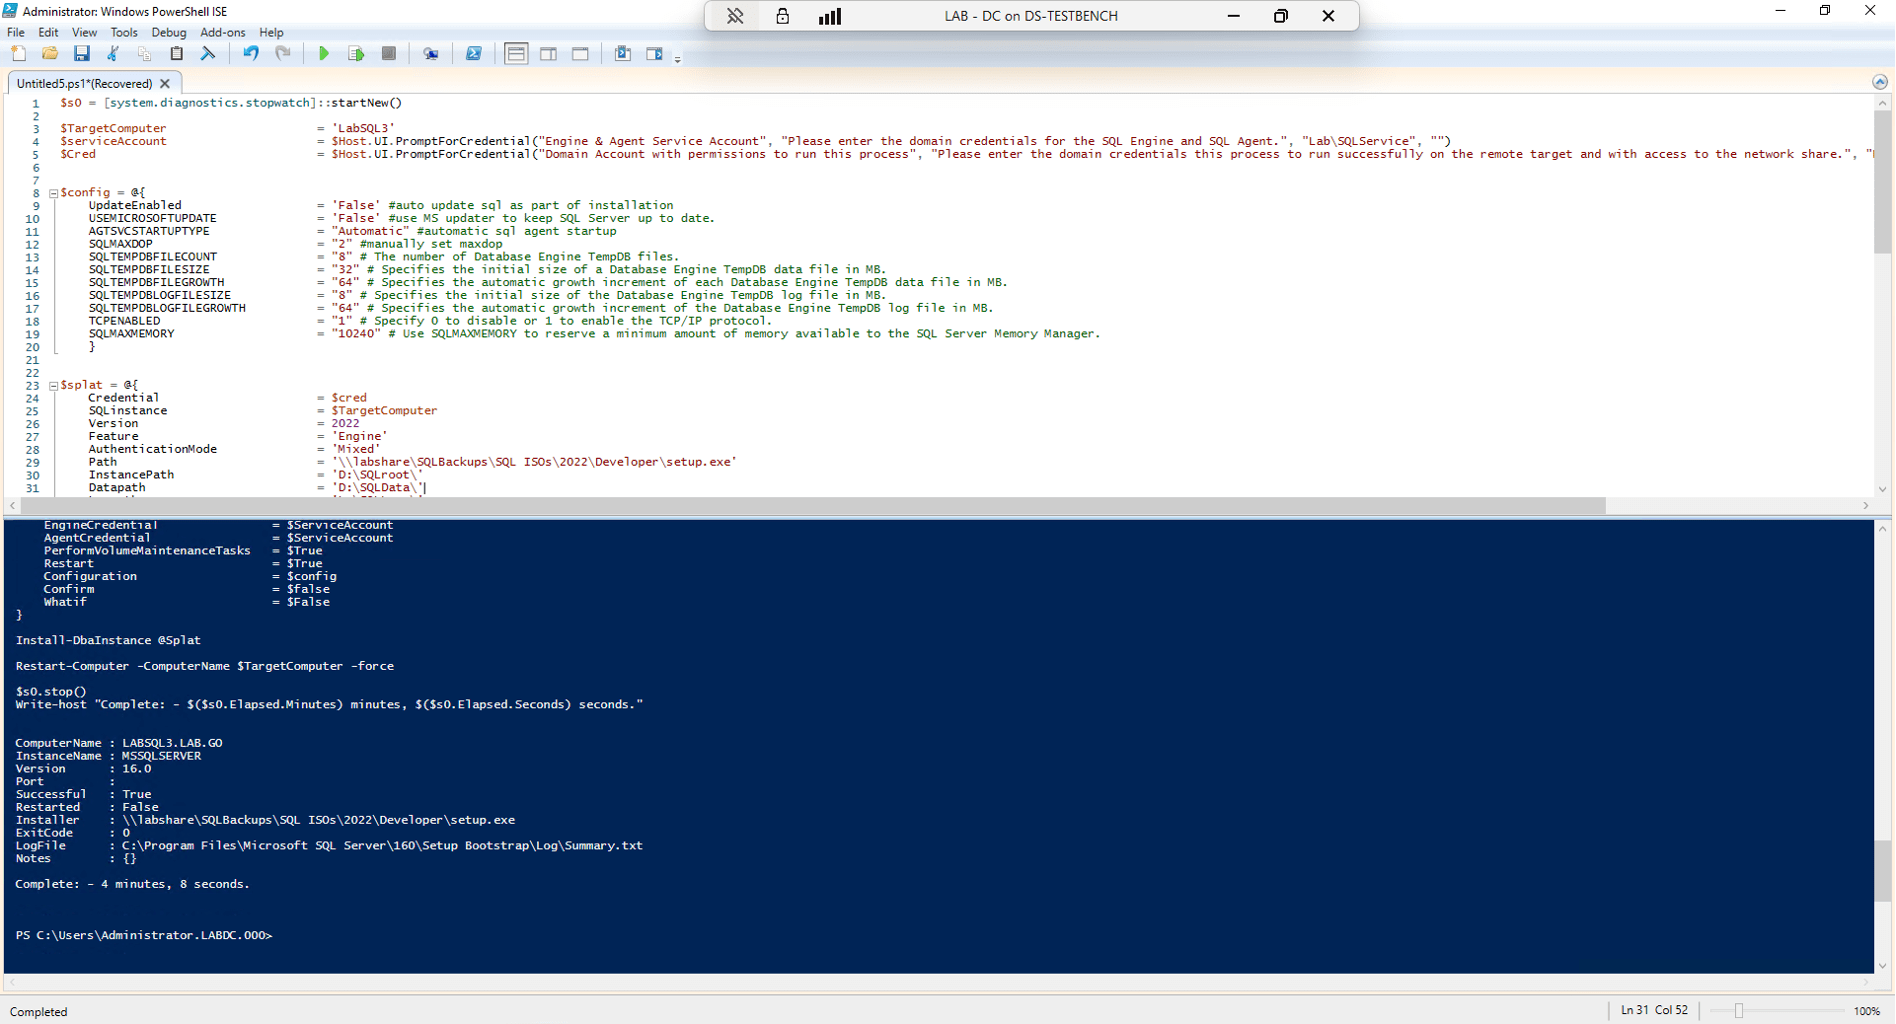
A brand new, configured, ready to connect SQL Server install in just over four minutes. Not bad! As one could easily assume, there was quite a bit more time getting the script ready and making sure the configurations were implemented on the post-install side, but that is all to be expected. This script is ultimately customizable with whatever configurations are expected for your environment!

Scenario 2: Adding a Named Instance to a Previous Install
Taking the previous script and adding a named instance to it only required a couple of modifications to account for it sharing the host.
Changes:
- Adding the instancename variable to the top to simplify use in other portions of the script.
- Lowered the max memory for the new instance to 2048.
- Lowered maxdop to 1.
- Added the instancename argument to the splat array.
- Added the instancename variable to the various paths to keep all the files isolated between instances.
$s0 = [system.diagnostics.stopwatch]::startNew()

$TargetComputer                     = 'LabSQL3'
$instancename                       = 'Reporting'
$serviceAccount                     = $Host.UI.PromptForCredential("Engine & Agent Service Account", "Please enter the domain credentials for the SQL Engine and SQL Agent.", "Lab\SQLService", "")
$Cred                               = $Host.UI.PromptForCredential("Domain Account with permissions to run this process", "Please enter the domain credentials this process to run successfully on the remote target and with access to the network share.", "LAB\DA", "")


$config = @{
    UpdateEnabled                   = 'False' #auto update sql as part of installation
    USEMICROSOFTUPDATE              = 'False' #use MS updater to keep SQL Server up to date.
    AGTSVCSTARTUPTYPE               = "Automatic" #automatic sql agent startup
    SQLMAXDOP                       = "1" #manually set maxdop
    SQLTEMPDBFILECOUNT              = "8" # The number of Database Engine TempDB files.
    SQLTEMPDBFILESIZE               = "32" # Specifies the initial size of a Database Engine TempDB data file in MB.
    SQLTEMPDBFILEGROWTH             = "64" # Specifies the automatic growth increment of each Database Engine TempDB data file in MB.
    SQLTEMPDBLOGFILESIZE            = "8" # Specifies the initial size of the Database Engine TempDB log file in MB.
    SQLTEMPDBLOGFILEGROWTH          = "64" # Specifies the automatic growth increment of the Database Engine TempDB log file in MB.
    TCPENABLED                      = "1" # Specify 0 to disable or 1 to enable the TCP/IP protocol.
    SQLMAXMEMORY                    = "2048" #Use SQLMAXMEMORY to cap the maximum amount of memory available to the SQL Server Memory Manager.
    }


$splat = @{
    Credential                      = $cred
    SQLinstance                     = $TargetComputer
    Instancename                    = $instancename
    Version                         = 2022
    Feature                         = 'Engine'
    AuthenticationMode              = 'Mixed'
    Path                            = '\\labshare\SQLBackups\SQL ISOs\2022\Developer\setup.exe'
    InstancePath                    = "D:\$instancename\SQLroot\"
    Datapath                        = "D:\$instancename\SQLData\"
    Logpath                         = "L:\$instancename\SQLLogs\"
    Temppath                        = "T:\$instancename\Tempdb\"
    BackupPath                      = '\\Labshare\SQLBackups\'
    AdminAccount                    = 'LAB\DA', "LAB\Administrator", 'LAB\SQlservice'
    SQLCollation                    = 'SQL_Latin1_General_CP1_CI_AS'
    EngineCredential                = $ServiceAccount
    AgentCredential                 = $ServiceAccount
    PerformVolumeMaintenanceTasks   = $True
    Restart                         = $True
    Configuration                   = $config
    Confirm                         = $false
    Whatif                          = $False
}

Install-DbaInstance @Splat

Restart-Computer -ComputerName $TargetComputer -force

$s0.stop()
Write-host "Complete: - $($s0.Elapsed.Minutes) minutes, $($s0.Elapsed.Seconds) seconds."
Results
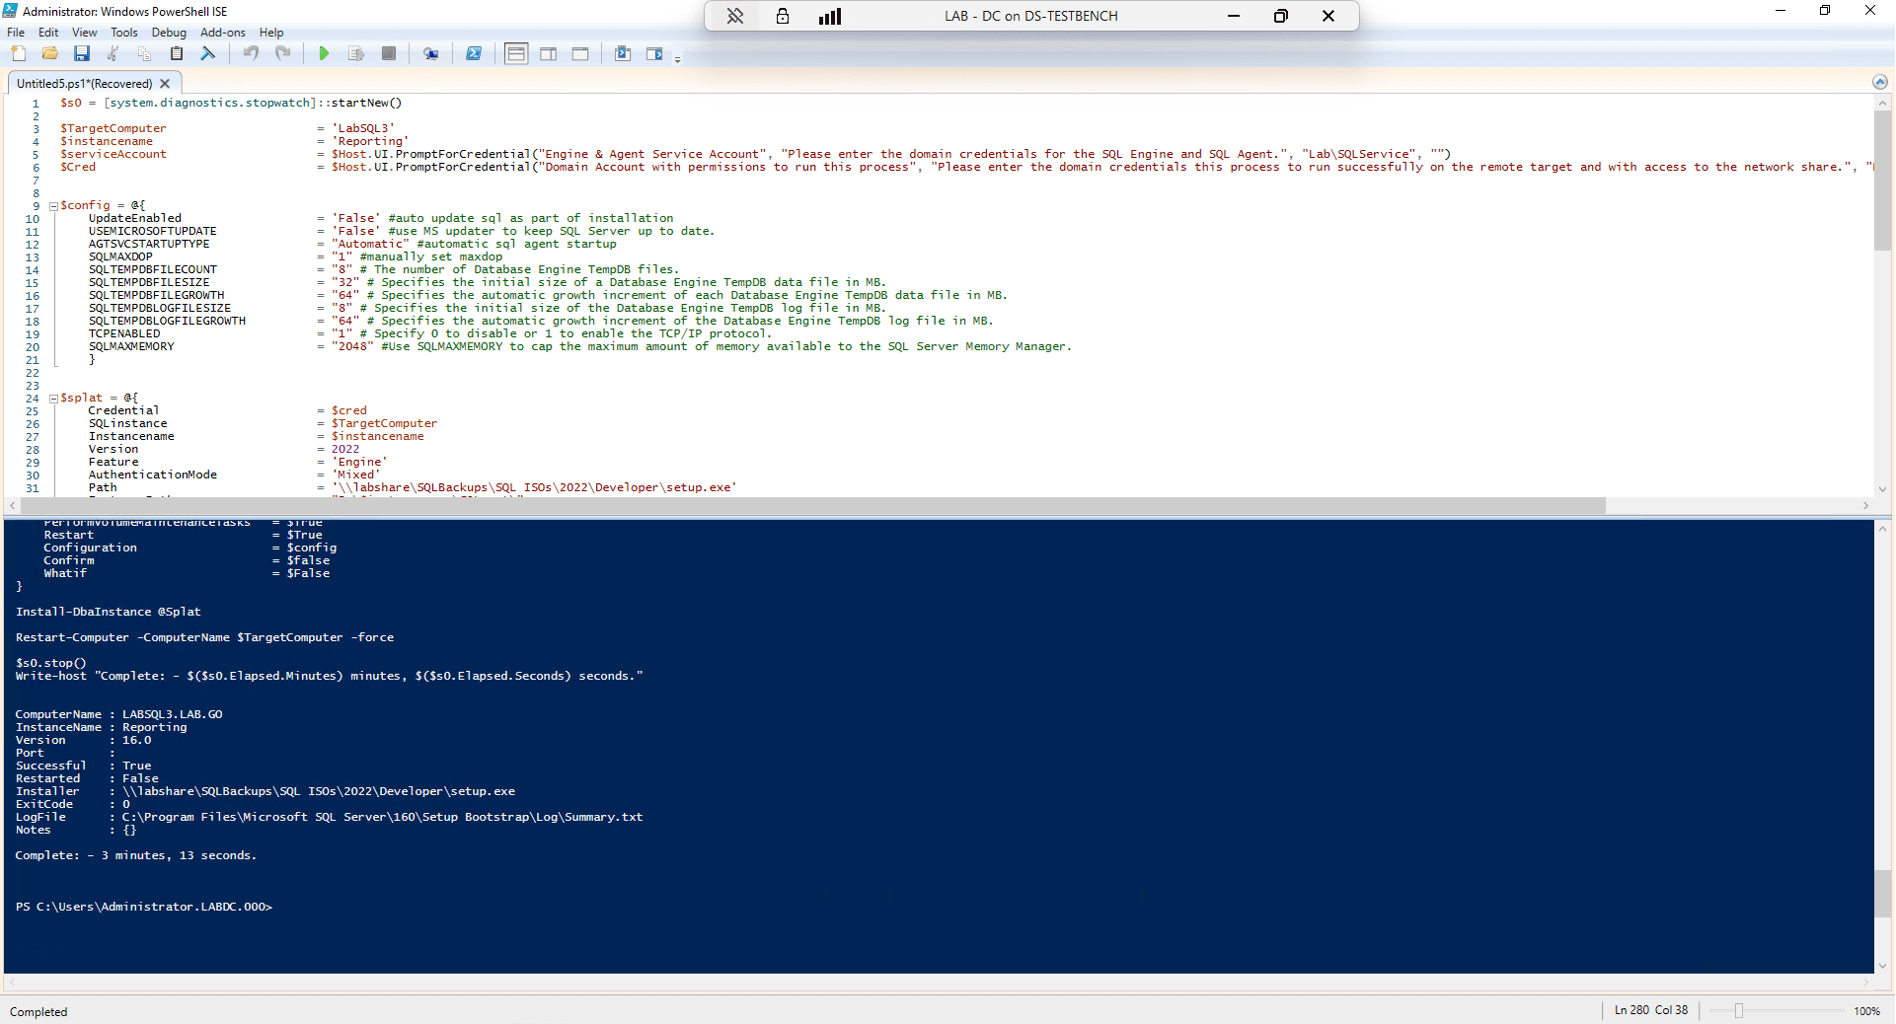
An added named instance with all the bells and whistles in just over three minutes? We’re on a roll! Not much to be said about this, unless of course you want to make it your jumping off point. Be sure to note that with the instancename argument used it will always create a named instance!

Scenario 3: Install and Also Update
I used the second scenario’s script and added the “UpdateSourcePath’ argument with the value to a network location where I store various SQL 2022 updates. This will cause the process to read the directory and apply any compatible updates to the instance as part of the installation, simplifying a major part of getting a new SQL Installation ready! This new instance is named ‘UAT’.
$s0 = [system.diagnostics.stopwatch]::startNew()

$TargetComputer 	            = 'LabSQL3'
$instancename                       = 'UAT'
$serviceAccount                     = $Host.UI.PromptForCredential("Engine & Agent Service Account", "Please enter the domain credentials for the SQL Engine and SQL Agent.", "Lab\SQLService", "")
$Cred                               = $Host.UI.PromptForCredential("Domain Account with permissions to run this process", "Please enter the domain credentials this process to run successfully on the remote target and with access to the network share.", "LAB\DA", "")


$config = @{
    UpdateEnabled                   = 'False' #auto update sql as part of installation
    USEMICROSOFTUPDATE              = 'False' #use MS updater to keep SQL Server up to date.
    AGTSVCSTARTUPTYPE               = "Automatic" #automatic sql agent startup
    SQLMAXDOP                       = "1" #manually set maxdop
    SQLTEMPDBFILECOUNT              = "8" # The number of Database Engine TempDB files.
    SQLTEMPDBFILESIZE               = "32" # Specifies the initial size of a Database Engine TempDB data file in MB.
    SQLTEMPDBFILEGROWTH             = "64" # Specifies the automatic growth increment of each Database Engine TempDB data file in MB.
    SQLTEMPDBLOGFILESIZE            = "8" # Specifies the initial size of the Database Engine TempDB log file in MB.
    SQLTEMPDBLOGFILEGROWTH          = "64" # Specifies the automatic growth increment of the Database Engine TempDB log file in MB.
    TCPENABLED                      = "1" # Specify 0 to disable or 1 to enable the TCP/IP protocol.
    SQLMAXMEMORY                    = "2048" #Use SQLMAXMEMORY to cap the maximum amount of memory available to the SQL Server Memory Manager.
    }


$splat = @{
    Credential                      = $cred
    SQLinstance                     = $TargetComputer
    Instancename                    = $instancename
    Version                         = 2022
    Feature                         = 'Engine'
    AuthenticationMode              = 'Mixed'
    Path                            = '\\labshare\SQLBackups\SQL ISOs\2022\Developer\setup.exe'
    InstancePath                    = "D:\$instancename\SQLroot\"
    Datapath                        = "D:\$instancename\SQLData\"
    Logpath                         = "L:\$instancename\SQLLogs\"
    Temppath                        = "T:\$instancename\Tempdb\"
    BackupPath                      = '\\Labshare\SQLBackups\'
    AdminAccount                    = 'LAB\DA', "LAB\Administrator", 'LAB\SQlservice'
    SQLCollation                    = 'SQL_Latin1_General_CP1_CI_AS'
    EngineCredential                = $ServiceAccount
    AgentCredential                 = $ServiceAccount
    PerformVolumeMaintenanceTasks   = $True
    Restart                         = $True
    Configuration                   = $config
    Confirm                         = $false
    UpdateSourcePath                = '\\labshare\SQLBackups\SQL Updates\2022'
    Whatif                          = $False
}

Install-DbaInstance @Splat

Restart-Computer -ComputerName $TargetComputer -force

$s0.stop()
Write-host "Complete: - $($s0.Elapsed.Minutes) minutes, $($s0.Elapsed.Seconds) seconds."
Results
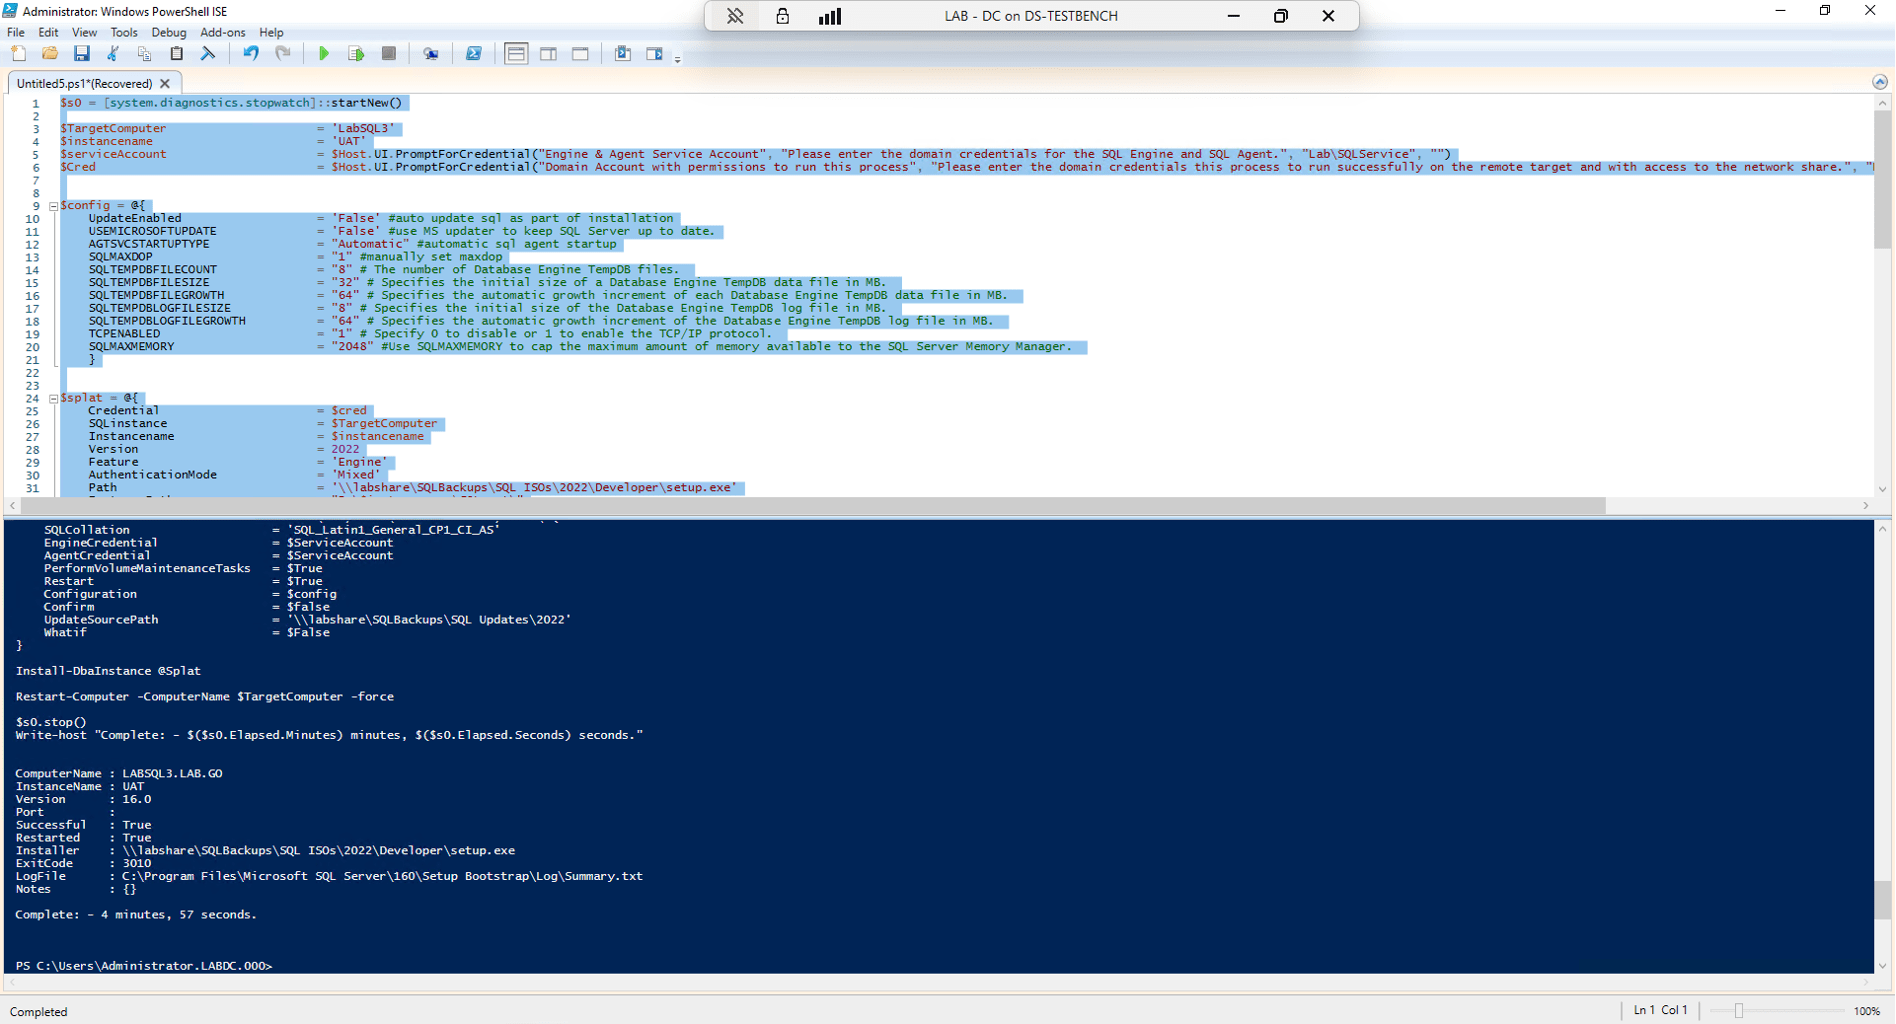
A fully installed and configured named instance that is updated to a specific build in less than five minutes? Can’t beat it! The process here is simple and again, very custom.
I tested two runs of this and for the second run removed all but two older SQL Updates from the directory and it seems to use the newest of the available options, which means you can just have a directory with one update file to make sure it is always the same or have a directory with all versions up to the most recent accepted version and all new SQL installs using this argument will be automatically updated to that build. This is as easy as it gets.


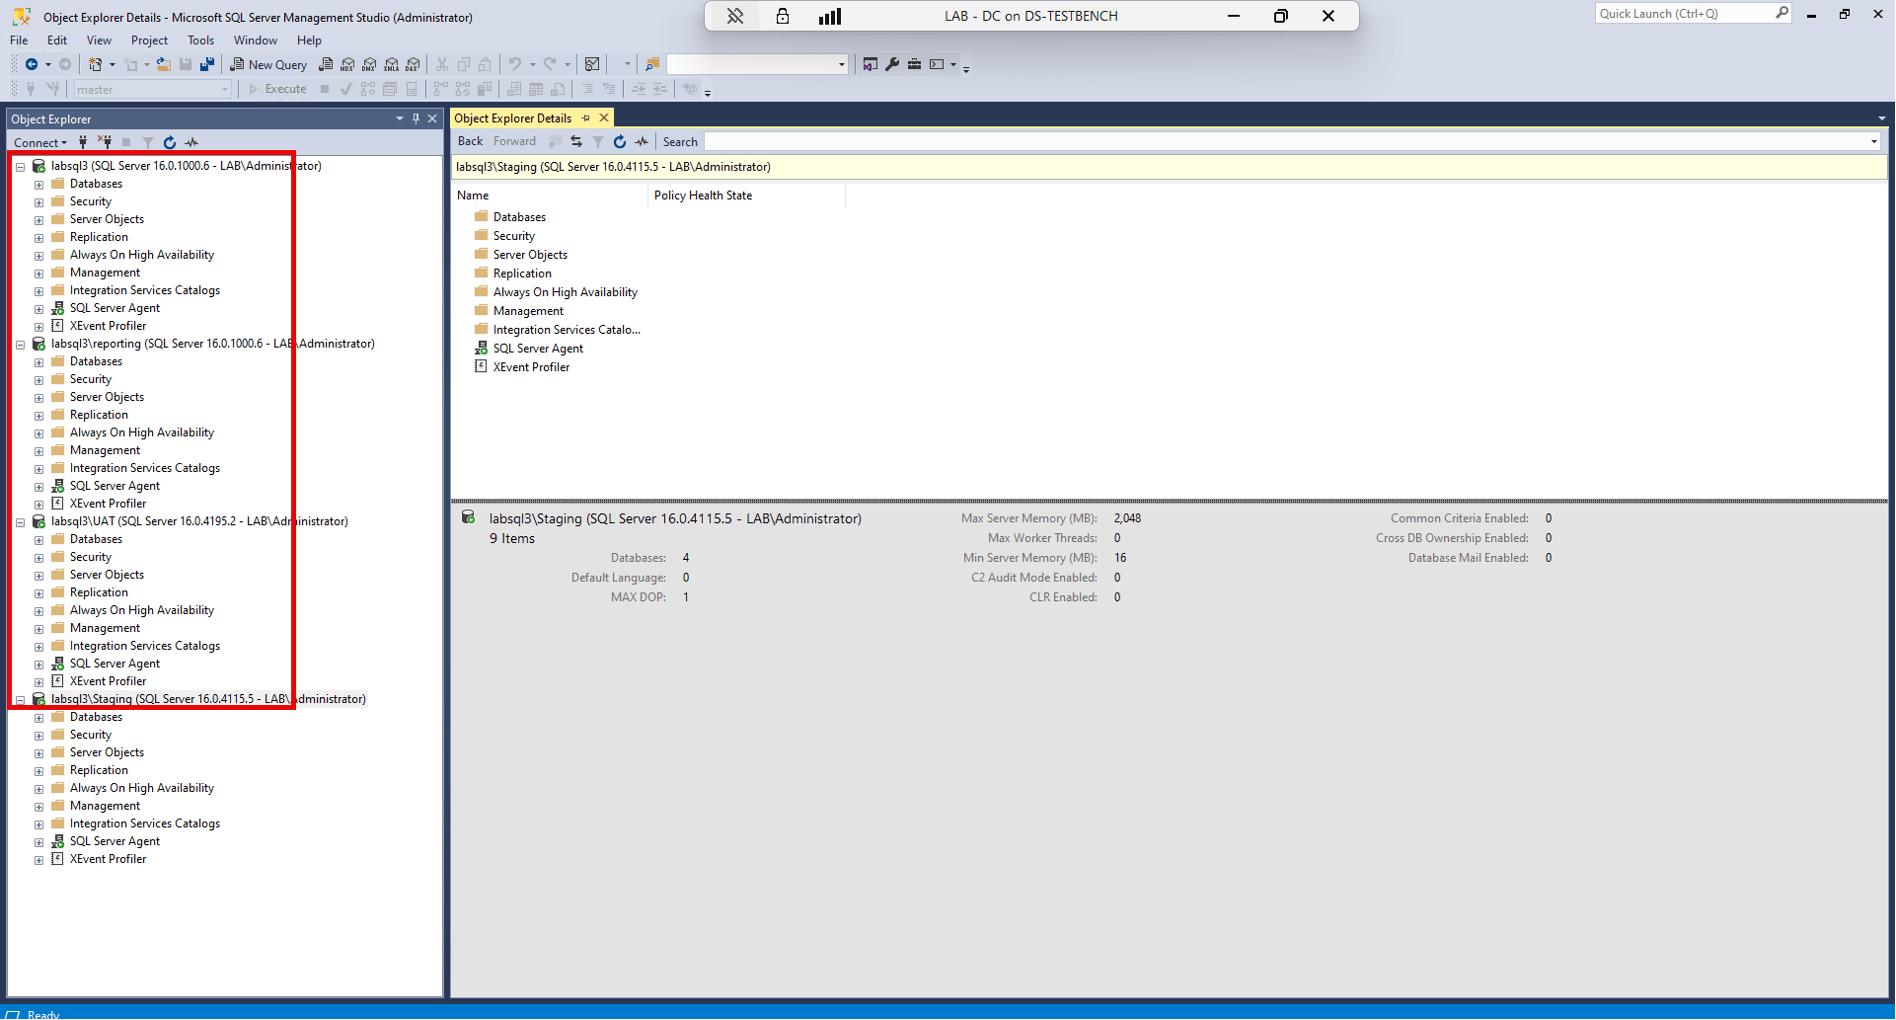
I did check many of the configuration options to ensure they deployed as expected. Big ones like default paths, max memory, build, and more. This process really does make things easy.
Review and Analysis
There is a common theme with the commands I am choosing, in that I believe them to be extremely useful to the DBA and that they should be added to your PowerShell toolbox. Install-DbaInstance is another one of those specific commands that opens up the world of automation by simplifying instance deployments, configurations, and updates all in one fell swoop.
Installing SQL Server can be extremely easy, although doing it right via the GUI can take time and is usually very repetitive. Taking a little time to get your default template scripted using this command will save you a lot of time, especially if you install SQL Server with any regularity.
Warnings and Caveats
The warning here will spread across all of the commands we audit as well as anytime you use PowerShell. This script installs and configures a new SQL server instance on whatever target you point it at and have permission to do so on. There is the possibility that you could point this script to a production host causing downtime due to the host restart, and then have resources taken by a second instance, reducing performance. Take care that you are using the correct host name, before starting this script.
You will also need to take some time reviewing each configuration option and argument to ensure the deployments meet your business requirements. As always, anything you build should be built in a test environment with unimportant data and the results should be reviewed before deploying to production.
Recommendations
This is a strong recommendation – if you install SQL Server more than once a week and are still using the GUI, this script is worth looking into. Between staging the needed files, working through the GUI, waiting for the installation to finish, manually restarting, kicking off the update and restarting again, it is easy to expect a regular SQL install to be 30 minutes or more. Saving at least 25 minutes per installation and not losing time to code switching or errors due to the tedium of the GUI are worth the effort. Modify this script with your environment’s requirements and try it out in a test environment. See for yourself how easy it is to save time!


Thanks for this post, David. I did this last week using dbatools for the first time but used a config file instead. I like your way better, so I will give it a shot this week. One thing I did notice when creating the config file in SQL Server 2022 is that there is a new installation parameter called PRODUCTCOVEREDBYSA. I don’t recall running across this when installing Developer Edition in the GUI but did with a paid version of Standard Edition. In the GUI it lists these as options.
Select the edition of SQL Server 2022 you want to install.
– Specify a free edition:
– Use pay-as-you-go billing through Microsoft Azure:
– Enter the product key:
— I have a SQL Server license with Software Assurance or SQL Software Subscription
— I have a SQL Server license only
X License type is required when a product key is supplied
In the config file I set PRODUCTCOVEREDBYSA = “True”, provided the PID, and it installed without any issues using dbatools.
Thanks Scott, I hope my path works for you! Thanks also for sharing your experience! If I had to wager I’d bet that SA in PRODUCTCOVEREDBYSA is ‘Software Assurance’. I wonder if there are any checks on that or if it will be a true-up issue, or if it isn’t true it doesn’t matter. Either way, I appreciate you sharing that so others can plan for it!